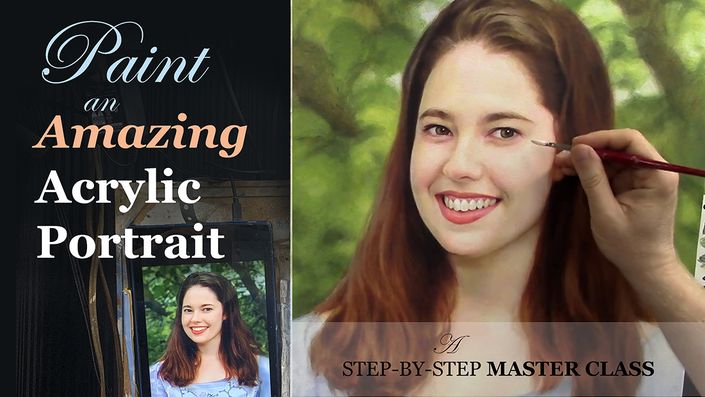
Paint an Amazing Acrylic Portrait
Step-by-Step Video Class to Take You From a Blank Canvas to Your Own Acrylic Portrait Masterpiece...Even if You're a Complete Beginner!
Enroll in Course
What if you could paint a beautiful portrait, one that you actually enjoy painting?
And what if you felt confident enough to show it to your family or give it as a special gift? And what if you could do all that without having to go to art school, watch hours and hours of YouTube videos, and you've never held a paintbrush before?
That's not a crazy pipe-dream.
Hi! If you haven't met me yet, I'm Matt Philleo, a professional portrait painter and instructor. Over the last 7 years, I have taught hundreds of artists, both complete beginners and those with some experience, how to paint a portrait they can be proud of.
Maybe you've painted a few portraits before. But they didn't turn out the way you wanted.
The colors were muddy.
You lost the likeness after painting over the sketch.
The skin tones were chalky.
Everything looked blotchy.
Or...maybe the canvas turned into a hot mess!
It's no fun at all. Maybe you've really taken a few painting classes, or watched YouTube timelapse videos, to try to glean some techniques. Acrylic is easy to get started with, but hard to master. What kind of mediums do you use to get it to blend smoothly?
I know the frustration.
You see, I was so close to giving up on acrylics. I was introduced to them in high school. Prior to that, I worked in pencil and colored pencil. As students, we squirted out huge gobs of Dick Blick student-grade acrylic, available in primary colors only. When I mixed everything, it turned to mud. Then, when I accidentally spilled water on the canvas, my painting just about washed away!
"Maybe I need better paint," I thought. So, I bought some Liquitex, which is still one of the best brands out there. I also saved up and got some nice brushes too.
But guess what?
I still struggled. I would paint a layer, only to have it begin to dry before I could finish smoothing it out. I brushed furiously, but then I dug a hole into the canvas! The rest of the painting had little white spots where the paint wouldn't settle into the texture. It was a mess, and I was so frustrated!
Why couldn't I get the paint to work for me, like I could with pencils?
I probably wouldn't be an acrylic painter today, unless I had met a man named Norbert Kox.
How it All Changed
Norbert Kox was an instructor at the University of Wisconsin-Green Bay. In the summer of 1994, after my sophomore year in high school, I took his one-week intensive class on the acrylic glazing technique. I bought all the paints and medium he recommended—pretty much the same ones I use today—and followed his instructions.
Oh, the things he could do with acrylic...his paintings were amazing! So vibrant, so detailed.
I could see the possibilities. Even though it took me a little while to get the hang of it, I was hooked. The glazing technique made so many things possible!
Whereas in the past, I would lose the likeness after painting opaquely on top of my sketch, now I could sketch with precision and detail, and slowly "fade-in" the glazes on top, like a Polaroid camera print. I could build up depth. My paintings no longer looked flat and lifeless.
And I could blend! I didn't have to fight the quick-drying properties of acrylic. Rather, I made them work for me, adding layer upon layer in rapid succession, creating a smooth transition of value and color.
Soon, I got portrait commissions from teachers and family friends. I also won awards for my work. Truly, the glazing technique was a game-changer.
It is this same technique I am teaching you today. God has blessed me so that I can do art professionally and I have had the privilege of time to be able to push the boundaries of this technique, using it to paint vibrant, realistic portraits for over 30 years! When I last chatted with Norbert before he passed on, he told me he was proud of me and what I accomplished with his glazing technique. That meant a lot.
"But can I do it?"
If you are wondering if it is possible to paint a realistic portrait with this quirky medium called acrylic, I'm here to tell you, absolutely it is!
But you might say, "Well, Matt, you've had years and years to practice your painting skills. I really would like to paint beautiful portraits of my grandchildren in the next month or two."
Not a problem.
I have taught hundreds of students in the last seven years, and I have seen what they can do with desire and the right step-by-step instruction. How long does it take? Not that long. Some of my students paint an amazing portrait—yes, even if they've never painted before—their very first portrait! Others take longer. After each portrait, they get better and better.
I can think of my student Diane, who started off very frustrated with acrylics. But now she is painting incredible portraits of her grandchildren and friends. And they LOVE the portraits she gives them! Or Emily, or Steve, or Godfrey, or Caroline. They all paint amazing portraits and they had very little experience starting out. (You probably know some of these artists because they are in our online painting group!)
So, are you ready? Let's do this!
Get started now!
Super Saturday Special: 50% OFF: Use code 50OFFSUPERSATURDAY at the checkout page (Ends December 2nd, 2024)
Let's paint an amazing acrylic portrait together.
I'll show you how step-by-step, in this, my NEW and IMPROVED version of my very first online painting class, "Paint Your First Amazing Acrylic Portrait," launched back in 2017 as a beta course.
I decided to do a complete overhaul on this course and make it way, way better. I still love the original course, but here is a side-by-side comparison of what has been (or will be) improved...
What Will You Learn in the Class?
Here is a breakdown of the lesson outline..
You Can Paint a Portrait!
- Welcome!
- Thank You for Taking This Class...and a Blessing on You
- A Tour of My Studio
- Let Me Show You What is Possible
- 3 Myths About Portrait Painting—BUSTED!
- Overcoming Challenges and Persevering as an Artist
- How to Get Better Quality in the Lesson Videos
- Getting Your Supplies Ready
- Why the Grid Method for Sketching?
- How to Grid Your Reference Image
- Introducing My "Super-Smooth" Sketching Method
- Sealing in Your Gridded Canvas
- How the Grid Should Look When Sealed
- BONUS: 7 Steps to Building an Incredible Acrylic Portrait
Here is the photo I will be painting during our class, of my wonderful wife Leah, who has encouraged me to never give up on my dream of being an artist...
- The 3 Steps of Sketching
- SKETCH, Part 1: Plotting out Basic Proportions
- SKETCH, Part 2: Filling in the Facial Features, Simply
- SKETCH, Part 3: Locking in the Likeness
- SKETCH, Part 4: Creating a Road Map for a Successful Painting
- SKETCH, Part 5: Dialing in the Details
- BONUS: A Few Refinements to the Hair (and Eyes)
- BONUS: How to Self-Critique Your Own Portrait
- Sealing in Your Sketch So it Won’t Smear
- BONUS: Extra Adjustments
- WHITE-OUT GRID: Large areas
- WHITE-OUT GRID: Small areas
- SEAL Your Sketch So It Won't Smear: Pre-sealing with Matte Medium/Water Spray
- SEAL: Brush Sealing with Matte Medium
- Recap on What We Accomplished
- The Completed Sketch—Image
- What We Plan to Cover in this Step
- What is Glazing?
- A Brief History of the Glazing Technique
- 7 Benefits of the Glazing Technique
- 4 Drawbacks of the Glazing Technique—and How to Overcome
- How Color Theory Works with Glazing (not what you think)
- Let Your Paintbrush Be Your Friend: About Your Brushes and How to Use Them
- 5 Brush Techniques and Tips
- Toning and Muting Your Sketch
- BONUS: The “Fantastic 5” Techniques for Shading and Blending
- Intro to this Lesson
- My “Slow Fade-In” Technique of Painting
- Choosing the Right Colors for Your Portrait
- Color Theory for Portrait Painting
- Let Your Reference Photo Be Your Guide: the Value Structure
- Setting Up Your Palette
- Diving into the First Glaze Without Fear (Creating Contrast and Coloring the Hair)
- The Second Glaze—Colorizing the Background
- The Third Glaze-Colorizing the Clothing
- Glaze 3.5—Coloring in the Sky
- The Fourth Glaze: Establishing Value Structure (and Skin Tones) on the Face
- How to Build Up the Value Structure and the Color Simultaneously
- Intro to this Lesson
- Roadmap to Shading Right
- "Nations, States, and Counties": How Your Portrait is Like Geography
- Let’s Talk About Tonal Value and How it Affects Your Portrait
- Demonstration: Mid-tones or "States"
- Demonstration: Colorizing the Hair and Building Up Tonal Value on the Face
- Let’s Talk About Value and How it Affects Your Portrait
- Contrast is King: How to Establish the Value Structure
- Building Up Depth With Layers
- Balance: What is Value Key and Why it’s Important
- Additional Demonstration on the Portrait of my Wife: Hair, Background, and Dress
- Additional Demonstration: Eyes, Hair, and Lips
- Additional Demonstration: Background Mid-tones
- Additional Demonstration: Shadows and Mid-tones on Clothing
- Intro to Skin Tones
- 3 Common Myths About Skin Tones, Debunked
- How Realistic Skin Tones are Really Painted
- How Skin Tones Work for Different Ethnicities
- Skin Tone Color Combination Suggestions
- Demonstration: Darkening Hair to Frame the Face
- Demonstration: Warm-Reddish Tints
- Demonstration: Eyes, Mouth, Small Shadow Shapes
- Demonstration: Yellowish Tints
- Demonstration: Colorizing Hair for Contrast
- TIMELAPSE: Transition Between Skin Tones and Blending Lessons
How I Painted the Portrait of My Lovely Wife Leah for this Class, Step-by-Step...
- Intro
- What is Blending?
- How to Use the “Fantastic 5” in Your Portrait
- How to Paint Beautifully Blended Portrait Backgrounds
- Demonstration: Blending in Darker Tones on Lower Half of Face
- Demonstration: Blending in Warmer/ Lighter Tones on Upper Half of Face
- Demonstration: Blending in Darker/ Cooler Tones in Hair
- TIMELAPSE: Blending in the Hair, Face, Background and Clothing
- Creating Smoothness With Semi-Opaque Layers
- How Do I Keep My Acrylic Paint From Drying So Fast?
- Adding Semi-Opaque Smoothing Glaze to the Clothing
- TIMELAPSE: Adding Contrast to Hair, Background, and Nuances in Face
- Intro to this Lesson
- 3-Step Process to Evaluate Your Portrait
- How to Use the Value Checker Tool to Measure Your Lights and Darks
- How to Double-Check Your Color
- Discussing Additional Value Adjustments
- A Different Approach to Self-Critiquing Your Portrait
- How to Make Adjustments to Value and Color
- TIMELAPSE: Darkening the Hair and Portions of the Dress
- TIMELASPE: Adjusting the Background, Eyes, and Hair
- Refining Edges to Improve Realism
- TIMELAPSE: Detailing the Dress and Adding Nuances All Over
- How to Use Unexpected, Interesting Colors to Dial in Skin Tones
- TIMELAPSE: Adding Nuances of Color to Eyes (Irises), Lips, and Hair
- TIMELASPE: Final Nuances (Eye reflections, lips, clothing, background)
- How Do You Know When Your Portrait is Done?
- The FINAL Final Nuances :)
- DONE! Signing Your Portrait
How will it all work?
- UPDATE: 7-27-24 The entire painting process is now recorded! You are more than welcome to paint along with me, but you can also use these techniques for your own portrait too.
- You can watch the lessons (7+ hours of video, broken down into short approx.10-15 minute videos) as much as you'd like, replay them, print out the guides—whatever you need.
- You can print out the reference photo, supplies list, and guides for some of the portrait lessons.
- You can ask me questions or comment below each video, to get answers and specific help when you need it.
- When you purchase the course, you get lifetime access to all the lessons and the bonuses. When I add new lessons or make updates, you get access to that too!
Bonuses?
Oh yes, I wanted to spice things up and add more value to this class. These amazing bonuses will help you even further in your portrait painting. Here they are:
- 7 Steps to Building an Incredible Acrylic Portrait Mini-Course: this is my "thesis" on portrait painting. The what, the why, and even some of the how. This is the way I approach my portraits. Learn the fundamental principles in this 2-hour class, and you'll be able to resolve mistakes in your portraits at their root, quickly...you will benefit from it, forever!
- My Five Fantastic Blending Techniques: If you'd like to blend with acrylic like a master, this brief but powerful demonstration will show you how!
- Any additional bonuses that I add to the course, you will have access to.
Other than the portrait of my wife Leah, THIS portrait is one I am MOST proud of—a portrait of my pastor and his wife...
...And I want YOU to paint a portrait you can be proud of too!
What is the Investment for a Course Like This?
- To go back to art school costs over $40,000 for just one year.
- I charge $497 for one month of mentoring with my students (meeting an hour a week)
- My original beta version of this class is $97.
- This new version, with all the improvements, I'm confident will be much, much better. More value and better results for you. And I've added several bonuses. Originally, I had the price set at $197 for the self-study version, because there's just that much in it. But I wanted to keep the price affordable for the average artist.
So, at the last minute, I changed it. You get this entire course for only $147!
Super Saturday Special: 50% OFF: Use code 50OFFSUPERSATURDAY at the checkout page (Ends December 2nd, 2024)
And don't forget my Satisfaction Guarantee...
If, after taking my course, you are not completely satisfied, just let me know, and I will give you a complete refund. Teachable (where my course is hosted) allows for 14-day refund, but I will extend it to the end of the recording period of our lessons, plus 30 days. I want to make sure that you feel completely confident about this decision to enroll in my course, and that there is no risk to you.
Enroll in "Paint an Amazing Acrylic Portrait" today!
Get started now!
Your Instructor

Since 1993, Matt has been painting portraits in acrylic, both on commission and for exhibition at art shows. In the last few years, he has been teaching students locally and worldwide how to use their God-given gifts and create beautiful paintings they can be proud to show. Currently, he lives in Chippewa Falls, Wisconsin with his wife and three children. When he's not painting or teaching, he enjoys spending time with God, his family, and enjoying nature.
Course Curriculum
-
StartWelcome! (to Early Bird Students) (3:51)
-
StartThank You For Taking This Class...and a Blessing on You (3:08)
-
StartA Tour of My Studio (5:43)
-
StartLet Me Show You What is Possible (6:28)
-
Start3 Myths About Portrait Painting—BUSTED! (9:09)
-
StartOvercoming Challenges and Persevering as an Artist (6:39)
-
StartHow to Get Better Quality in the Lesson Videos (2:09)
-
StartPDF Downloadable Guides for this Class
-
StartGetting Your Supplies Ready (13:45)
-
StartWhy the Grid Method for Sketching? (2:51)
-
StartHow to Grid Your Reference Image (4:09)
-
StartGridding Your Canvas—Large Squares (8:49)
-
StartGridding Your Canvas—Inset Squares (5:10)
-
StartIntroducing: My "Super-Smooth" Sketching Method (2:32)
-
StartSealing in Your Gridded Canvas (5:22)
-
StartHow the Grid Should Look When Sealed (0:37)
-
StartThe 3 Steps of Sketching (7:16)
-
StartSKETCH, Part 1: Plotting out Basic Proportions (15:19)
-
StartSKETCH, Part 2: Filling in the Facial Features, Simply (9:23)
-
StartSKETCH, Part 3: Locking in the Likeness (16:18)
-
StartSKETCH, Part 4: Creating a Road Map for a Successful Painting (43:12)
-
StartSKETCH, Part 5: Dialing in the Details (20:42)
-
StartBONUS: A Few Refinements to the Hair (and Eyes) (6:13)
-
StartBONUS: How to Self-Critique Your Own Portrait (22:20)
-
StartBONUS: Extra Adjustments (10:04)
-
StartWHITE-OUT GRID: Large areas (11:41)
-
StartWHITE-OUT GRID: Small areas (6:07)
-
StartSEAL Your Sketch So It Won't Smear: Pre-sealing with Matte Medium/Water Spray (6:06)
-
StartSEAL: Brush Sealing with Matte Medium (5:55)
-
StartRecap on What We Accomplished (1:06)
-
StartThe Completed Sketch—Image